Maham Fatima's Portfolio

Light Step
DESCRIPTION
Introducing the Light Step instrument! A fun way to create music especially for children. This instrument makes music making a playful and imaginative experience.
Why Light Step?
-
Focuses on performance aspect of playing an instrument allowing them to get comfortable with the idea while focusing on the puppet
-
Simple to use
-
Collaborative or solo instrument - have one person play the light box and the other control the puppet or control both yourself
-
Spark creativity through imagination
Inspired by Kid's Ideas!
My mom works with young children. I wanted to create an instrument that children would enjoy playing to help foster a love for music. I looked into puppets as children often watch or use puppets while growing up. This device can be used as a musical instrument for children or can be included in puppet shows to make them more engaging.
Why a Puppet and Light Box?
With a puppet and a note player, kids can channel their inner ventriloquists (they often switch between talking from their mouth or the puppet during their performances). They can choose to let the puppet "control" the music, switch roles, or join forces to play together on the light boxes. This interactive element encourages kids to explore their creativity and engage in storytelling through music and their performances.
Concept Development + Final Artifact
Materials Used:
Components
- Arduino Uno
- Resistors and jumper wires
- Knock sensor
- Tilt - switch sensor
- Photo resistors x4
- rotary encoder
- Breadboard
Materials used to make puppet
- felt and thread
- mini shoes and hoodie
- microbit (for puppet expressions)
- velcro
Materials to make stage and enclosures to hide wires
- small canvas
- shoebox
- paper
- hot glue
- tape
- fairy lights and mini led lights
- wooden boxes
How It Works:
1. The photo resistors control four different notes. Applying lights sends the midi note information and plays it! You can utilize the flashlight to do this!
2. The puppets right foot contains a knock sensor so as you stomp and dance it gets activated as the fifth note.
3. lift and straighten the other leg to activate the tilt switch sensor which controls the velocity from 60 to 100 where the velocity.
4. the rotary encoder allows you to increase or decrease the octave. Pressing the button on the encoder resets the pitch so its easy to switch back and forth
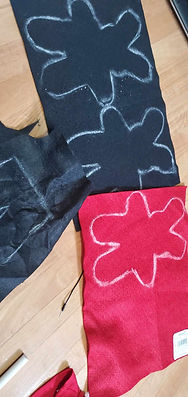

Creating the puppet
Enclosing the photoresistors
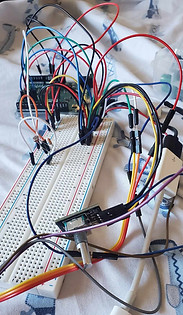
Early wiring before covering it
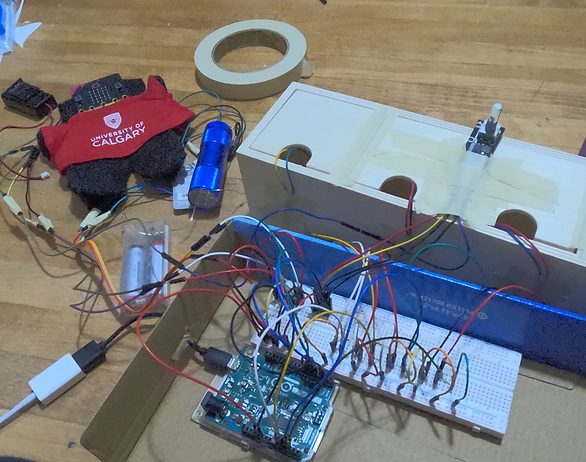
Starting to hide the wires.

Final look once wires had been hidden. I made a cover out of cardboard, glue and cardstock and added a canvas and lights to look like a stage

Video showing interaction
Reference materials:
Referenced for the code:
Arduino - rotary encoder: Arduino Tutorial. Arduino Getting Started. (2024, September 20). https://arduinogetstarted.com/tutorials/arduino-rotary-encoder#google_vignette
codebender_cc, & Instructables. (2017, October 7). How to use a photoresistor (or photocell) - arduino tutorial. Instructables. https://www.instructables.com/How-to-use-a-photoresistor-or-photocell-Arduino-Tu/
Knock sensor module arduino tutorial. Starting Electronics, Electronics for beginners and beyond. (2017, December 13). https://startingelectronics.org/tutorials/arduino/modules/knock-sensor/
KY-020 Tilt Switch Module. Arduino Modules. (2021, December 15). https://arduinomodules.info/ky-020-tilt-switch-module/#google_vignette
Lynch, T. (2019). Using Arduino Leonardo to send USB MIDI data. Creative Technology Lab. https://lab.arts.ac.uk/books/physical-computing/page/using-arduino-leonardo-to-send-usb-midi-data
MIDIUSB. MIDIUSB - Arduino Reference. (n.d.). https://www.arduino.cc/reference/en/libraries/midiusb/
ryancs_peng. (2020a, October 18). Simple arduino photoresistor piano. Instructables. https://www.instructables.com/Simple-Arduino-Photoresistor-Piano/
Modified this pattern for the puppet:
Kimara, ar. (2009, March 10). Walking bunny finger puppets. Wee Folk Art. https://weefolkart.com/walking-bunny-finger-puppets/